I'm off on a slight excursion into model yachts. They have a lot in common with gliders, at least, they have a wing above the water and another one below it! So here's my first ever effort at an RC model boat. I've chosen a Footy class model, as they're so cute. Well, Chuck's following a plan you say? Er, not quite. I'm following a few plans and no plan! Hull is based on Mario Stiller's Papaya III (his beautifully drawn plans are available on the Footy class website).
 Template placed on to 3mm Depron foam.
 Cutting Depron is so easy. In fact, it's so easy, that it's easy to make a mistake!
 Pinning up the bulkhead. I'm using wider side pieces, and also decided to widen the transom edges. The reason for this is not really strength, but waterproofing. Larger glue areas must be more waterproof.
 All the hull parts ready for assembly. That foam strip is not part of the hull, but just a test piece for paint - this one (Japlac) did not dissolve the foam.
 Sides joined to transom, bulkhead and stem piece. I'm using UHU Por, becaause I love the stuff. And the tea!
 At this stage, it weighs a mere 7.5g.
 Now the bottom of the hull, trimmed and sanded smooth. Much quicker to assemble than a plane, methinks.
 Close up of the stem piece. This will have a nose piece glued on it later.
 Side view of the hull.
 Dry fitting the roughly carved nose piece. This will be added at the end and carved to shape and size.
 View from the transom (stern end).
 Another view of the hull.
 Plan view of the hull.
 Close up of the bulkhead. The keel will fit on to this.
 Front view.
 Rudder taking shape. I glued an aluminium tube on to a 5mm balsa piece. Glued that onto the transom. The carbon fibre rod is glued to the balsa rudder (1/16" hard). Two teflon washers at each end of the bearing. Used epoxy for all these ruddery bits.
Next, some painting, keel making, rudder pushrod, mast tubes, sheeting, decking and sails!
 Template placed on to 3mm Depron foam.
 Cutting Depron is so easy. In fact, it's so easy, that it's easy to make a mistake!
 Pinning up the bulkhead. I'm using wider side pieces, and also decided to widen the transom edges. The reason for this is not really strength, but waterproofing. Larger glue areas must be more waterproof.
 All the hull parts ready for assembly. That foam strip is not part of the hull, but just a test piece for paint - this one (Japlac) did not dissolve the foam.
 Sides joined to transom, bulkhead and stem piece. I'm using UHU Por, becaause I love the stuff. And the tea!
 At this stage, it weighs a mere 7.5g.
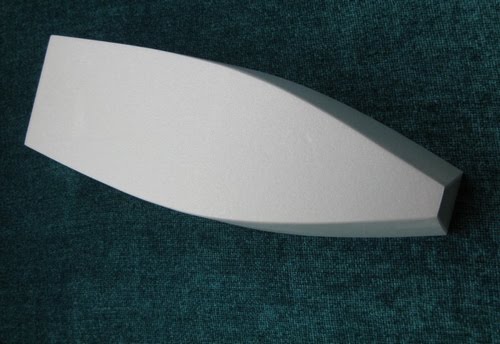 Now the bottom of the hull, trimmed and sanded smooth. Much quicker to assemble than a plane, methinks.
  Close up of the stem piece. This will have a nose piece glued on it later.
 Side view of the hull.
 Dry fitting the roughly carved nose piece. This will be added at the end and carved to shape and size.
 Another view of the hull.
 Plan view of the hull.
 Close up of the bulkhead. The keel will fit on to this.
 Front view.
 Rudder taking shape. I glued an aluminium tube on to a 5mm balsa piece. Glued that onto the transom. The carbon fibre rod is glued to the balsa rudder (1/16" hard). Two teflon washers at each end of the bearing. Used epoxy for all these ruddery bits.
Next, some painting, keel making, rudder pushrod, mast tubes, sheeting, decking and sails!