
This is my scratch-built electric version of an iconic 1970s i.c. trainer - the Radio Control Modeler magazine (RCM) Trainer Junior. The article on this 52” span model appeared in the June 1974 edition and opened with the remarks: "Another reliable, good flying 60 becomes a reliable, good flying 40. An aerodynamic design that makes for slow, stable flying when you want it but, will loop, roll, spin, fly inverted, or…[sic]."
Introduction
Designed by Joe Bridi and Don Dewey, the RCM Trainer Junior became the “Trainer 20”, kitted out by Great Planes. As far as I can see, the Great Planes kit version differed in having a split elevator instead of one continuous sheet and framework to hold the wing dowels instead of solid balsa block. Both plans are available from the Outerzone website. These trainer type designs were ubiquitous and became a staple. I suppose the modern equivalent would be foam trainers, like the Durafly Tundra, E-Flite Timber, FMS Kingfisher, Max-Thrust Riot, etc, although of course, they are tail-draggers, as opposed to tricycle undercarriage.
I was curious to see how an old-timer balsa trainer would compare to the modern stuff. Also, this would be my first tricycle undercarriage RC plane. With photos, I’ll show you the build, the mods I made and describe the first few flights.
Building the RCM Trainer Junior
Rather than messing about with pdf files, I conveniently obtained 2 copies of the 1974 original plan from eBay seller “mrhobby” in Maryland, USA. I left one plan intact, and used the other one. Thanks to mrhobby for continuing to help the modelling community. While I'm at it, thanks to folks at 4-Max UK, DuBro in the USA for very helpful email correspondence, and Balsaworkbench.com for some inspiration. I cut the plan into sections to fit on my building board. Adhesives were primarily aliphatic resin (EvoStik exterior), epoxy (Devcon 5min and Araldite precision) e.g. for the fin-fuselage joint, and just a little CA, e.g. thin Zap for Great Planes CA hinges, and on a few bits and pieces where CA made sense.
Tail Feathers
The elevator was solid balsa, as per the plan. To try to keep the tail end light, I departed from the plan and constructed a built-up fin, rudder and stabiliser.
You can just see the thin ply ‘biscuit’ brace to strengthen the centre joint. Why did I bother with this? Well, many experienced RC modellers told me that i.c. engine aeroplane designs require lots of nose weight when you convert them to electric, because the i.c. motor and tank are heavy compared to a modern brushless electric motor and LiPo.
Fuselage
Fuselage construction followed, and my next mods to the plan were to change the second bulkhead to an open frame and add a ply bulkhead for the electric motor ahead of the one for the nosewheel steering mount (DuBro nylon for 5/32” (~4mm) wire).
For access, there is the hatch above. Underneath, I made another hatch out of 1/16” ply, eventually painted white and held on by 4 screws. That needed an egg-shaped cutout to allow for movement of the sprung nosewheel steering arm.
It is important to have the nosewheel steering arm spring centered on the bottom edge of its bulkhead. It's simple physics of moments and indeed, it is shown on the plan. That said, I can't count the number of times I've seen that spring dangling way below a model!
Wing
I used the pinhole method to make templates: hold the plan over a piece of card, use a pin to prick holes around the desired outline, e.g. the wing rib, then join the dots on the card, and cut out a template. I ended up using thinner ribs outboard and thicker ones inboard, just because my balsa sheet stock was limited.
Spars were 6mm bass wood, rather than balsa. Another departure from the plan was to angle slightly the thick innermost ribs on each wing half and then sand them for the dihedral joint. To me, this was easier than the additional wedge shaped centre rib and dowels shown in the plan.
To glue on the LE and TE, I used this technique with pole elastic and clothes pegs. It worked very well.
Similarly for the pine blocks in the middle and pins for the tips.
As you can see, I also made wing servo mounts, for individual wing servos. I think this is more modern and easier than the torque rod single servo setup.
It means short control rods externally, but that itself is useful when it comes to setup and adjustment. Further, it gives me the option of programming differential or flaperon.
The plan specifies wing dihedral as 1 ¼” (32mm) under each tip rib. When joining the wings, I reduced this to 20mm and added short ply braces across the central joint. Generally, I had kept an eye on the weight of each wing half as I built it and chose materials to keep them balanced. This was very useful because at the end all I had to do was adjust my choice of sheeting balsa to even out the lateral wing balance - no balancing weights were required! As per the plan, after sheeting, I applied glass cloth over the centre joint.
Undercarriage
In addition to the wire sprung nosewheel described above, I made the undercarriage legs out of aluminium sheet and longer than the plan, as I needed clearance for a 12” prop that suited the recommended electric motor (advice from 4-Max). Since it is not “Dural” and therefore prone to bending, I decided to also add suspension: a central binding eyelet, springs and wire connecting rods.
Servo Mounts and Connections
I added the rudder snake outer at this stage, but here I made a mistake: I built all the fuselage servo mountings at this point - Rudder (snake), Elevator (pushrod) and Nosewheel (pushrod). This eagerness bit me later on, as I’ll explain below in the sections CG and Balancing, and Radio Installation.
Covering
The obligatory naked model photo:
For the Oracover covering scheme, I deliberated for quite a while. My aims were to show off the framework in the tail feathers and wing, aid in visibility - distinguish underside from top and model heading forwards or backwards - and to look nice!
Underside is all white except for some red stripes (see photo in the Undercarriage section). I allowed myself a single stripe of black trim, and a couple of side panel stickers. I applied thin white foam around the inside of the motor bay to clean up the look and perhaps provide some sound damping. The hardest parts to cover were the front corners of the wing. I could not get them wrinkle free. It was awkward because I was using one sheet for the main bay and tip. I suppose I could cut off the film from the outside edge of the last rib to the tip, and try to stick on new smaller sections without wrinkles, but I’ll leave that as a rainy day task.
CG and Balancing
To my total irritation, it came out nose heavy. I guess the motor is pretty chunky and far forward. As I’d built the servo mounts, pushrods and fitted the snake already, I couldn’t easily move the battery back enough to balance it out. And even if I’d ripped out all the servo mounts and moved the battery back, it would have been very awkward in use as I’d need to take the wing off to change battery. So, having considered all the options, I moved the battery back as far as I could while still being able to access it from the main hatch and added tail weight. Generally, I prefer not to add tail weight, but here, the convenience won out. I fixed lead buttons (for curtains) inside the rear of the fuselage, which I reinforced. I also added a tail skid, which would save the elevator in an awkward tail-down landing.
Altogether, I added about 35g to the rear. So, I would have been ok building solid balsa tail feathers after all!
Radio Installation
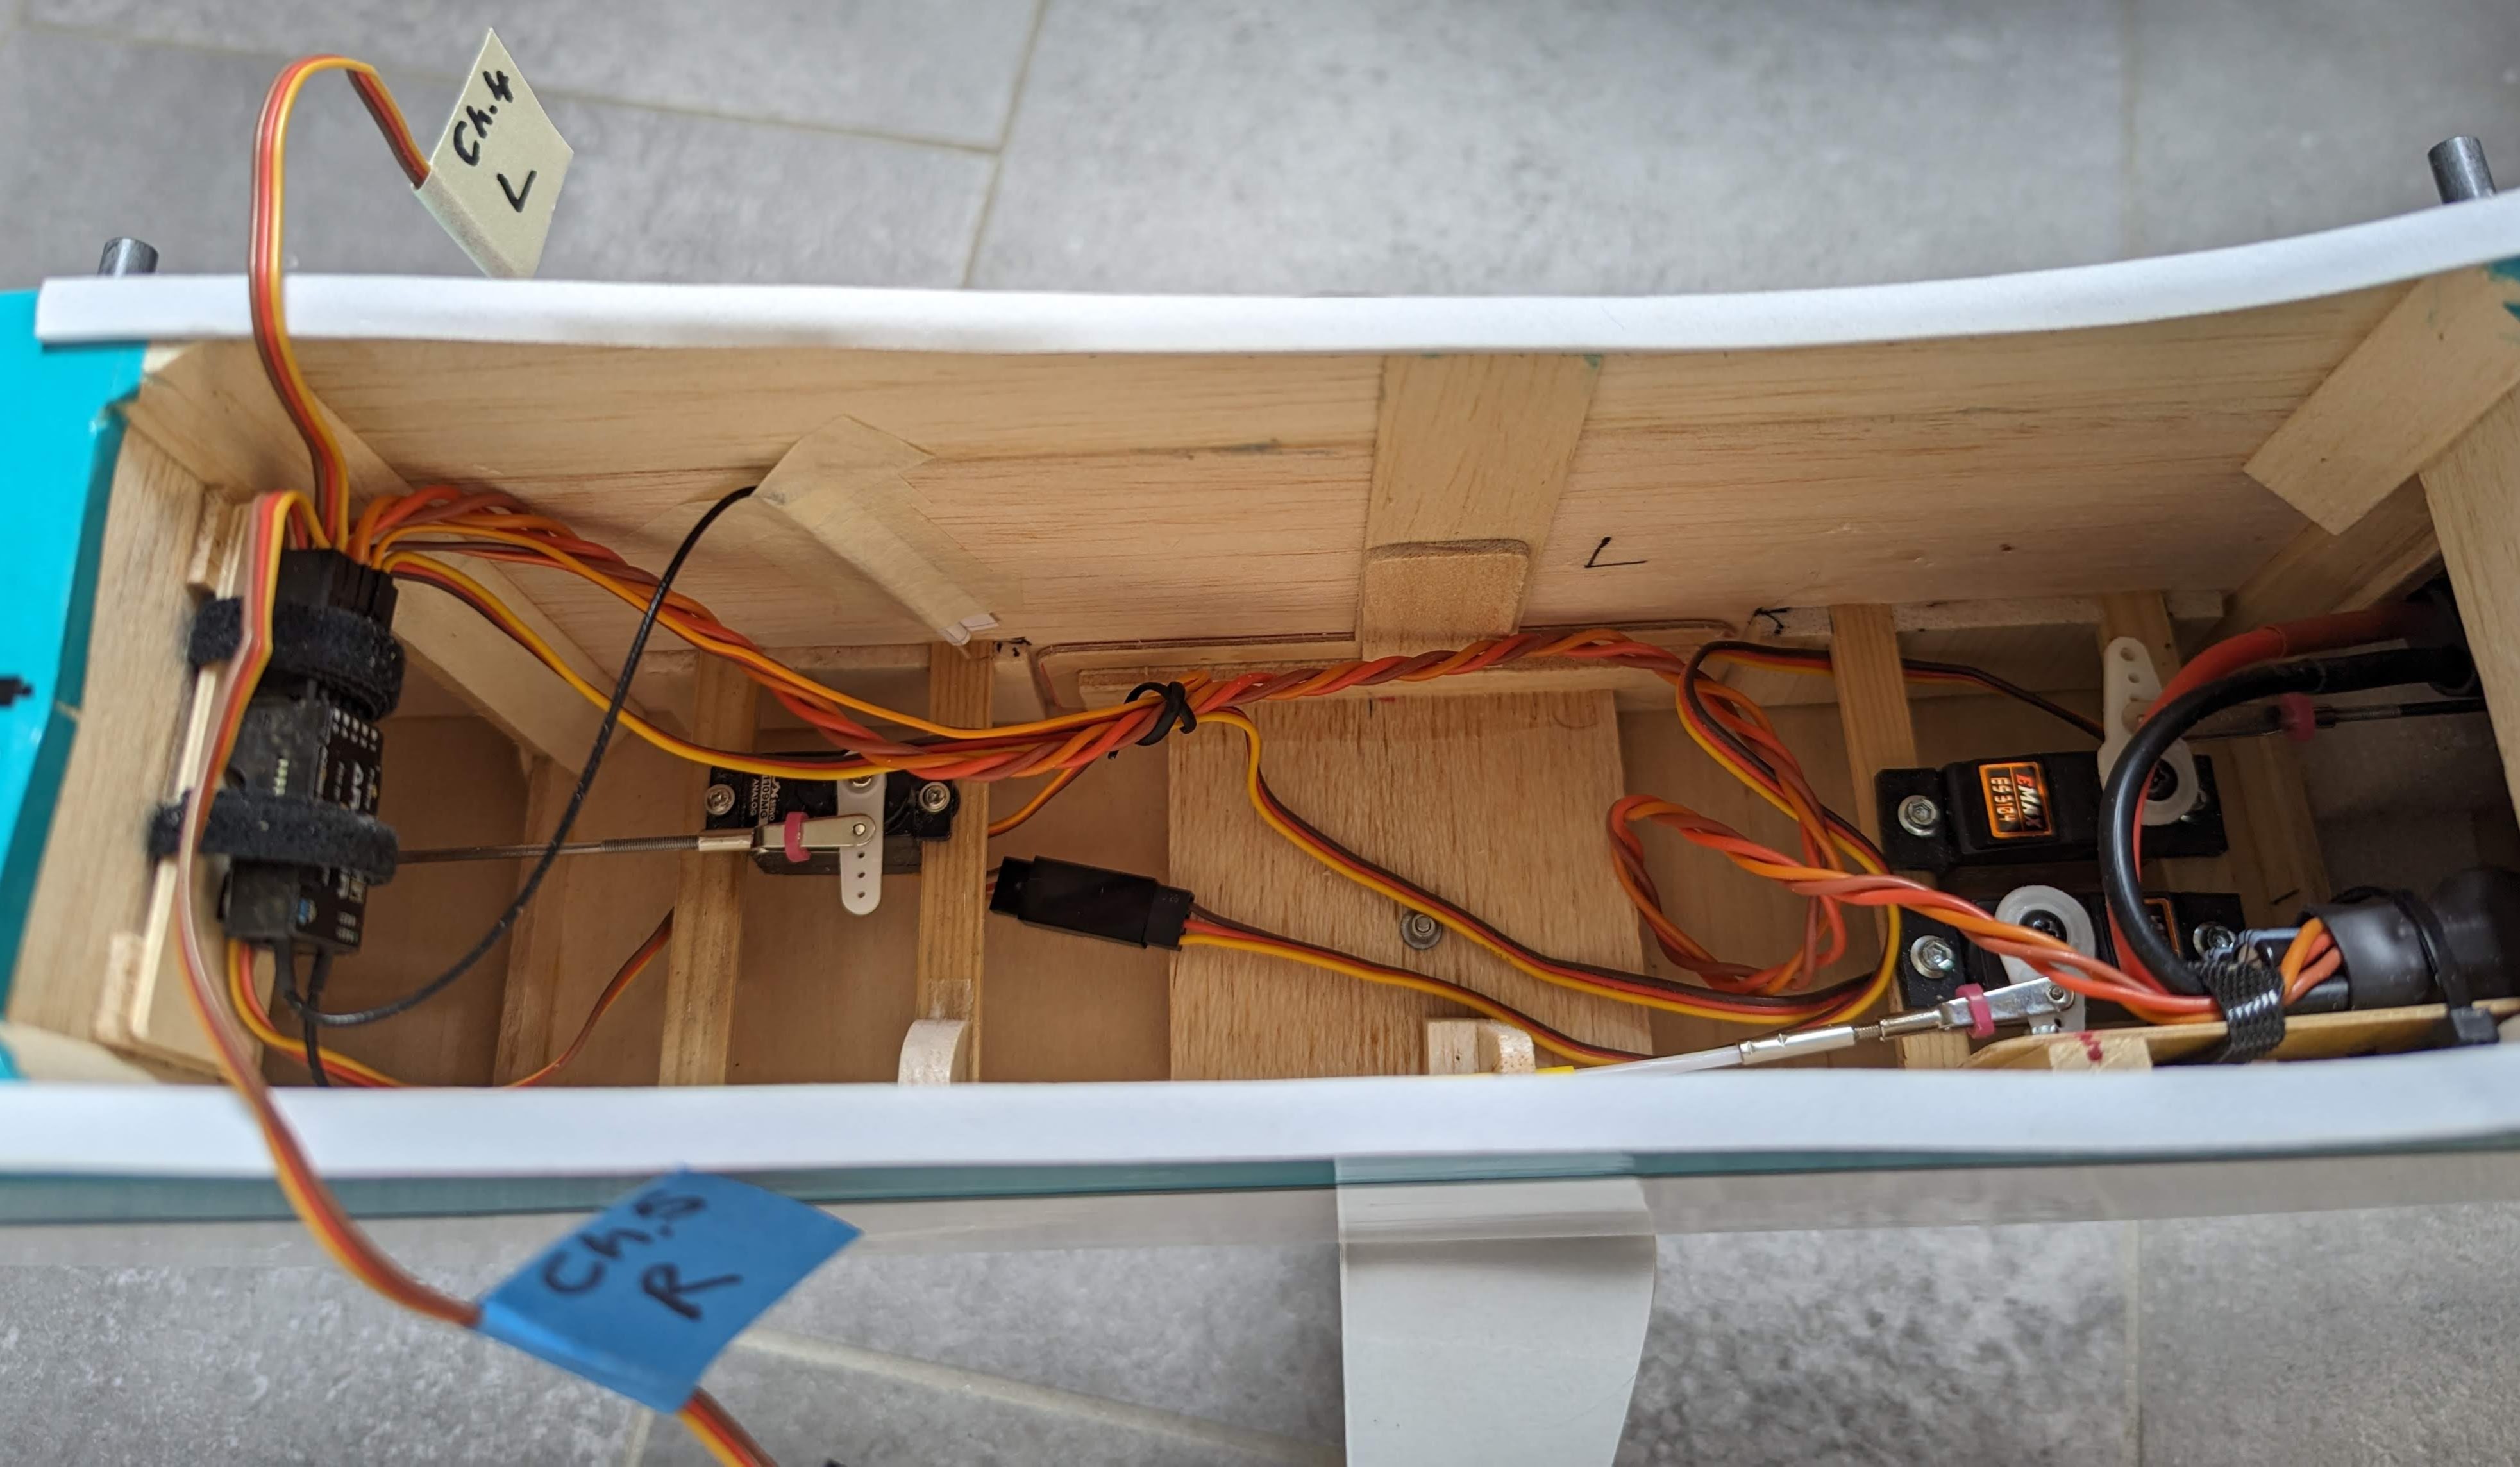
Here are photos of the fuselage-mounted servos and receiver. First, a top plan view, looking right and finally looking left:
The best bits are the paper tubes that allow me to orient and fix the antennae tips at 90° to each other. They help to ensure that the working tip portions of the antennae are kept straight. As a reminder, in 2.4GHz kit, the strongest connection between transmitter and receiver antennae is when they are parallel to each other. I made the paper tube by rolling thin paper over a cocktail stick (using squared paper helps with alignment), and gluing the long edge with pva adhesive. Leave some paper over as a flap, to help with mounting. I mounted the tubes with paper masking tape, in case I need to reposition things after experimenting.
What’s it like to fly?
It was a lovely day for the maiden, sunshine and 7mph wind. With the CG at the forward end of the range on the plan, transmitter on low rates, I did all my checks. Nerves mounting, the take off was exciting and easy! I just moved the throttle open, picked up speed and lifted her off! She seemed nicely balanced fore-aft and laterally, just two clicks of down trim required. Changing the throttle setting, I was surprised that I didn't feel the need for any thrust line or balance changes. She glides really well, can fly slowly - so wing loading must be low - and there is loads of power available if I need it. A slightly bumpy landing - because I didn’t align for the cross wind very well and didn’t hold off properly. Plane was fine, except that the right undercarriage leg had straightened a bit, making the right side sit low. Decided to stop there, quit while I was ahead and return another day! The colours were magic for orientation and my wife said it looked great in the air. Very satisfying.
.jpg)
A few weeks later, I flew again and discovered the answer: the plane feels fabulous on mid and high rates - simply brilliant. I tried some aerobatics: inside loops, Immelman turns, humpty bumps, rolls, reverse shark tooth, cuban eight. I could hold inverted too. I tried a spin, but wasn’t sure if what ensued was a spiral dive, although it looked pretty. I have not yet tried outside loops. It was so much fun to fly, and I nailed these landings, properly lining up and holding-off for a gentle touchdown.
.jpg)
After just a few flights, I love this plane. It’s not as “flippy” as the modern foam trainers mentioned above. To explain further what I mean, consider the BMFA ‘figure of eight’ manoeuvre that is used in the A and B tests. This should be thought of as two level 360° circles, not a squashed 8. Compared to a modern foam trainer, the Trainer Jr was much easier to control during this - I found it easier to adjust the bank, turn radius and height. I’d imagine that the unmodified original, with its greater wing dihedral, would be even more stable. I’d describe the response of my version as immediate, smooth, predictable, and very rewarding. I also enjoy the tricycle undercarriage as it seems to steer well on the ground and lessen the influence of a crosswind after touchdown.
Specifications
Span: 52”
AUW ready to fly: 1.56kg
Balance point: 81mm from LE
Motor: 4-Max Professional Brushless Outrunner 3547, 960kv
Prop: APC Electric 12x6
ESC: 4-Max 40A
Battery: Overlander Sport LiPo 2200mAh 3S 35C XT60 connector
Receiver: FrSky Archer R6 ACCESS
Transmitter: Taranis QX7 ACCESS, Open Tx
Rudder servo: EMAX ES3104 - 19g
Nosewheel servo: EMAX ES3104 - 19g
Elevator servo: JX 1109MG - 9g
Aileron servos: EMAX ES08MAII - 12g
Conclusion
A self-build model nearly always provides enjoyment during construction, but you never know whether you’ll enjoy the flying until you try. This one definitely ticked both boxes. Overall, the project has been hugely satisfying and worthwhile - it seems that the original designers’ opening remarks were correct!


.jpg)
.jpg)

.jpg)


.jpg)
.jpg)


.jpg)
.jpg)


